How to get a custom email/professionalemail ? name@name.com
Do you want a cool email address like you@arealoser.com or chandler@bing.com guess what you can get it for FREE or maybe almost free. Every email has two part
1. Username- which is unique in every domain but different domain names can use same username. It helps the mail delivery system to identify where a mail is suppose to go
2. Domain- Domain name is the second part of the email and is our identity on the internet domain are readily available at very low cost
To explain further lets take an example the Address on a letter can be equivalent to domain name and the user name will be your personal name if the postman has to deliver a letter he will first go the address which is in our case domain name and then to the person he has to deliver in our case user name so if there two person(username) are at same address (domain) he will get confuse on whom to deliver but same username at different domain wont create the problem
Lets start buy buying domain at godaddy.com
Type the domain name you want with the extension you want it then click on add to cart

Click on continue with these options


Create an account or sign in if have your account then pay the amount for domain
 Then go to https://workplace.zoho.com/orgsignup.do mail service which provides a free email hosting service for 5 accounts and upto 5 GB
Sign Up With your details

Type the domain you bought from godaddy

Go to this link https://mailadmin.zoho.com/cpanel/index.do#domains/adddomain/ and add your new domain and then verify it using the steps given in help section below
Add CNAME for verification - GoDaddy
If the DNS Manager for your domain is hosted with GoDaddy, follow the steps below to add a CNAME and verify the domain.
1. Login to your GoDaddy DNS Manager. Select the My Account menu and choose Domains.
2. Expand Domains and click the Manage DNS button for the domain you want to verify.
3. The DNS Manager page will open with information about existing DNS records.
4. Scroll down to the Records section and click the Add button to add a DNS record
5. Select CNAME from the Type drop-down menu.
6. In the Host field, enter the unique zbcode (zb*******) generated for your domain in Zoho Mail.
7. In the Points to field, enter zmverify.zoho.com.
8. Click Save.
9. Now come back to mailadmin.zoho.com page and click 'Verify by CNAME'.
10. If the DNS information is correctly propagated, the domain will be verified. You can proceed with the next steps to create user accounts.
Configure MX Records for Email Delivery - GoDaddy
If your domain's DNS Manager is hosted with Go Daddy, follow the below steps to add MX records for your Domain for email delivery.
1. Login to your GoDaddy DNS Manager. Select the My Account menu and choose Domains.
2. Expand Domains and click the Manage DNS button for the domain you want to verify.
3. The DNS Manager page will open with information regarding the existing DNS records.
4. Scroll down to the Records section and click the Add button to add a DNS record.
5. Select MX from the Type drop-down menu.
6. In the Host field, enter @ to denote the default domain for email delivery.
7. In the Points to field, enter mx.zoho.com.
8. In Priority field, select 10
9. Click Save
10. Click Add again to add another MX record with value mx2.zoho.com under Points to and
11. set Priority to 20.
12. Repeat the steps to add the third MX record with value mx3.zoho.com and Priority set to 50.
Check my other post's too
What to do after buying arduino?
How to recover deleted files?
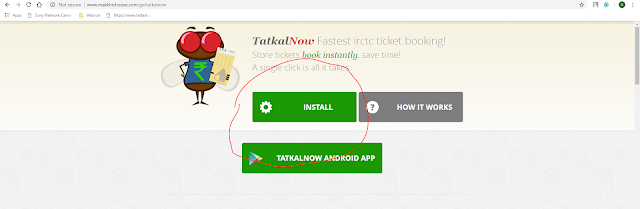
Book Tatkal Ticket Every Time | Fastest Method
How to get a custom email/professionalemail ? name@name.com
How to use VPN/Proxy free | High speed ?
How to screencast or mirror on iphone?
WARETRONICS
What to do after buying arduino?
How to recover deleted files?
Book Tatkal Ticket Every Time | Fastest Method
How to get a custom email/professionalemail ? name@name.com
How to use VPN/Proxy free | High speed ?
How to screencast or mirror on iphone?
WARETRONICS


Comments
Post a Comment